Взятие штанги на грудь с виса hang clean
Содержание:
Английская лексика для бега
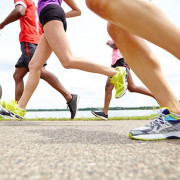
Спортивный бег в английском выражается не только глаголом to run (бегать), но и глаголом to jog (бегать трусцой). Но какое бы слово вы не выбрали, бег — это одна из самых дешевых форм упражнений. Все, что вам для этого нужно — пара беговых кроссовок, плейер с любимой аудиокнигой на английском и беговая дорожка, которую вы выбираете сами. Just run!
Если вы фанат бега, вам потребуется целый список английских выражений.
Fun run — благотворительный забег
Возможно, вы заходите поучаствовать в благотворительном забеге — fun run. В такой гонке меньше заботятся о победе, и больше о том, как получить удовольствие от процесса. Длина трассы для благотворительных забегов чаще всего составляет пять километров, и это обозначается своеобразным кодом — 5K.
Color run — «цветной» или «красочный» забег
Этот вид бега становится очень популярным. Бегуны одеты в белые футболки, которые становятся желтыми, фиолетовыми, голубыми, розовыми — ведь по мере прохождения дистанции, бегунов осыпают разноцветным мелом.
Цветные забеги рекламируют как самые позитивные пятикилометровые забеги на планете. Быть может, и вам посчастливиться стать участником одного из таких забегов, если его проведут в вашем городе. С другой стороны — зачем ждать, организуйте такой забег сами!
Mud run — «грязный» забег
Такие забеги очень сложны. И грязны. Обычно это командная работа на дистанции с исключительной сложностью. Добраться до финиша всей командой — обязательное условие забега.
Zombie run — зомби-забег
Бывает и такое! Чтобы внести разнообразие в мирное течение жизни родного городка, бегуны устраивают живописные и жутковатые «зомби-забеги». Группа бегунов в костюмах неумирающих мертвецов преследует другую группу бегунов, одетых в полосатые купальники обычные спортивные костюмы. В свете популярности сериала The Walking Dead («Ходячие мертвецы») — очень актуально.
Training routine — план тренировок
Чтобы подготовиться к любому соревнованию, нужно тренироваться — это очевидно. Выражением training routine называют план тренировок, согласно которому вы готовитесь к забегу.
To improve one’s time — улучшать время преодоления дистанции
Преданные делу бегуны стараются улучшить свое время (to improve one’s time): пробежать большее расстояние за меньшее время. Скорость бега (англ. pace) обычно выражается в минутах, за которые бегун пробегает милю или километр.
Подтягивания на турнике[править | править код]
| Подтягивания | |
| англ. Pull-up | |
| Техника выполнения и главные задействованные мышцы в упражнении | |
| Тип упражнения: | |
|---|---|
| Движение: |
тяговое |
| Кинематическая цепь: |
открытая |
| Какие мышцы работают | |
| Целевые мышцы: |
• широчайшие мышцы спины• мышцы предплечья |
| Вспомогательные мышцы: |
• трицеппсы• дельтовидные• бицепсы |
| Выполнение | |
| Инвентарь: |
• турник• тренажер для подтягиваний |
| Отягощения: |
атлетический пояс, к которому крепится блин |
| Варианты выполнения: |
• узкий хват (больше работает бицес)• широкий хват (больше работает спина)• с использованием жгутов• на низкой перекладине |
| Сложность: |
высокая |
| Травмы: | |
| Похожие упражнения: | |
| Преимущества: | |
|
эффективно для развития мышц спины и рук |
|
| Рекорды: | |
|
612 раз — 70-летний Ли Шин-Йонгом из Южной Кореи (1994 г.) |
|
| Бодибилдинг упражнения {{Упражнение}} |

Задействованные мышцы
https://youtube.com/watch?v=AMIOAQ-TB1I%3F
Подтягивания на мизинцах (мировой рекорд)
Подтягивания — это упражнение, чаще всего выполняемое на турнике; рабочие группы мышц: комплекс мышц рук (главным образом,предплечья, бицепсы) и спины (широчайшие). Чем шире хват руками за перекладину, тем больше нагрузка ложится на широчайшие мышцы спины; чем уже хват – тем больше нагрузка ложится на бицепсы. Если подтягиваться, касаясь перекладины затылком, то широчайшие мышцы растягиваются в ширину. А если подтягиваться, касаясь подбородком, то широчайшие растягиваются ещё и в толщину. При узком хвате, ладонями к себе, дополнительную нагрузку получает нижняя часть широчайших, находящаяся в районе талии.
Подтягивания анатомически относятся к вертикальным тягам
Как научиться подтягиваться (видео)править | править код
https://youtube.com/watch?v=Rq8SWhmOSe0%3F
Подводящие упражнения
А что делать, если не можешь подтянуться ни разу? В этом случае нужна соответствующая программа тренировок или выполнение специальных подводящих упражнений
При этом важно помнить, что правильно выполненное подтягивание задействует в большей степени работу мышц спины, а не бицепсов или другие мышц рук.. Подводящие упражнения:. Подводящие упражнения:
Подводящие упражнения:
- подтягивание на низкой перекладине,
- подтягивания в неполную амплитуду,
- подтягивания с помощью партнера по тренировкам,
- подтягивания с использованием жгутов
Техника подтягиванийправить | править код
https://youtube.com/watch?v=B12Nxq8ZZyc%3F
Техника подтягиваний (видео)
Ухватитесь за турник верхним хватом, руки чуть шире ширины плеч. Повисните на перекладине. Далее подтянитесь, при этом постарайтесь коснуться верхней частью груди перекладины. Сделайте паузу на секунду в верхней точке амплитуды, а затем плавно вернитесь в стартовое положение.
Чем шире используется хват в подтягивании, тем больше задействованы в работе круглые мышцы, благодаря которым обеспечивается расширение спины. Хват для подтягивания должен быть с ладонями направленными от вас. По возможности лучше использовать устойчивую скамейку или другую подставку, высота которой отрегулирована таким образом, чтобы перекладина оказалась на уровне груди. Удерживая перекладину, спуститесь со скамейки, согните колени и плавно опуститесь в нижнюю точку, обеспечив максимальную растяжку верхней части спины. Перед тем, как подняться, сделайте паузу на 2-3 секунды, чтобы широчайшие мышцы как следует растянулись перед напряжением.
Подтягивания необходимо выполнять до момента, пока перекладина не будет на уровне верхней части грудной клетки. Точную технику подтягиваний смотрите на видео.
https://youtube.com/watch?v=Pw1b7MS311g%3F
Подтягивание с отягощением (видео)
https://youtube.com/watch?v=pRFar1efVLM%3F
Как научиться подтягиваться
Points of Performance for the Squat Snatch
- Push your knees back as you stand the bar up from the ground, keeping the hips and shoulders rising at the same rate
- From the mid thigh pull the bar into the body and aggressively jump, extending the hips, knees, and ankles (triple extension)
- With a big shrug of the shoulders, elbows come high and outside the bar then back around while pulling yourself under to receive the weight
- Receive the bar in a full overhead squat with the arms locked out over the middle of the body
- The bottom of the squat is with the crease of the hip below the knee
- Drive through the heels back to a standing position
- The snatch is completed when the knees and hips are fully locked out and open at the top
Why are pull-ups so hard?
We’ve all been there. The pull-up tower stands proudly in the corner but somehow there’s always other exercises in your home gym that you end up doing. Even though you know how good pull-ups are for you (if you don’t … the last bit of this guide is for you!) The truth is pull-ups are not as easy to get into and stick to as other forms of exercise.
And we’re not even talking about one-arm pull-ups either. Just the regular kind.
The weight isn’t adjustable!
It’s not like picking up a lighter dumbbell, or adjusting the pin on the weight stack. When it comes to pull-ups, you’re stuck with your body weight, unless you get something to help you (more on that in a bit). If you’re 90kg, that’s a heck of a weight to have to start lifting when you think about it.
Struggling with pull-ups? You’re in good company!
According to research, most people can’t do even one simple pull-up. With the average being between 0 and 2. The Strength Level website lists that novices should be able to attain around 5 – 6 and intermediates should hit around 10 – 11. Although it’s worth noting that there’s a lot of variables come into play here, such as weight, age and physical condition.
Pull-ups are tough, but worth grinding out
But the important thing to remember is there’s nothing wrong with you physically if you’re struggling with pull ups. Most people who are good at pull-ups will tell you they’re one of the hardest exercises to master. Stick with it though and don’t let your pull-up bar gather dust. This is by far one of the more rewarding exercises you can do.
There aren’t many exercises you can do in your home gym that are better for upper arm and back development
Expensive solutions – assisted pull-up machines
If you’re like most home gym’ers, you’ll have invested (wisely!) in power tower to do dips and pull-ups. One advantage people going ot commercial gyms have is they can jump onto one of the assisted pull-up machines. If you’ve not seen these, they have a platform you kneel on and a counter weight that you can adjust. You can set it so that even the slightest pull on the bar can pull you up.
Unlike other gym equipment, you add more weight to make the exercise easier. It’s a brilliant way to scale into pull-ups, but also super-expensive. These machines typically start at £1000 and are not good value for a home gym. They also take up a lot of space so they’re not exactly practical unless you’ve got loads of space.
Benefit #8: They Are Somewhat Of A Cardio Workout
Another big benefit of doing pull ups on the regular is that they do actually count as cardio, at least if you do them fast enough! While you may not be able to do pull ups for 30 minutes straight, you can make them a part of a circuit routine and you will definitely get a decent cardio workout. Of course working out your heart is very beneficial to your overall health.
A stronger heart leads to having a slower resting heart rate, lower blood pressure, and it helps to prevent heart and artery disease too. Plus there is the fact that a stronger heart allows more blood to be pumped to your body more efficiently, thus giving your muscles more of the oxygen they need to function and ultimately increasing your physical performance.
Level 3 Pull-Up Workout: Assisted Pull-Ups

Okay! It’s time to get to ACTUAL pull-ups here! Personally, I don’t like using the assisted pull-up machine in a gym as it doesn’t give you the full feeling of a pull-up, but it’s certainly better than nothing.
Instead, I recommend doing one of these alternatives:
#1) Assisted Pull-ups with chair

Either one foot or two on the chair, depending on your needs. Your feet are ONLY there for support, use your upper body as much as possible.
You can also use a box or similar sized object for the same result:

#2)Assisted Pull-ups with exercise band:

You can get different types of exercise bands with different levels of strength, or a variety pack for easy progression.
Put your foot in the exercise band and pull yourself up.
#3) Assisted pull-ups with a partner:

Have a friend hold your feet behind you and help you complete each rep. Have them use the least amount of help possible to get you through your workouts.
Here’s how to do an assisted pull-up:
- Clench your butt and keep your abs tight throughout the exercise – try not to swing like crazy.
- Keep your shoulder blades pinched behind you throughout the movement and focus on PULLING the bar down with your arms.
- Use the least amount of assistance that you can handle – as soon as you can do multiple pull-ups with both feet on the chair, switch to just one foot.
- If you’re using an exercise band, try to get a few bands of varying tension so you can decrease the resistance as you get stronger.
- As soon as you can do 3 sets of 8 with assistance, it’s time to move on to .
For another reference, Coach Jim and Staci show you how to do a variation of assisted chin-up right here:
This is probably the TOUGHEST level before getting your pull-ups. If you get stuck on “assisted pull-ups” and “assisted chin-ups”, you’re not alone. This is where most people get stuck.
We work hand-in-hand with people like you to get them their first pull-up in our Online Coaching Program. If you don’t know how to fit these movements into your workouts, or you just want somebody to give you the exact workout to follow every day, we got you!
Finally, a workout that includes Level 3 pull-up exercises
- Monday – Assisted Pull-ups – 3 sets of 8 reps
- Wednesday – Inverted Bodyweight Rows – 3 sets of 8 reps
- Friday – Assisted Chin Ups – 3 sets of 8 reps
This will help you ramp up to Level 4.
На чем подтягиваться[править | править код]
До XIX столетия все камеры, особенно в полицейских участках, были похожи на клетки из толстых стальных прутьев. Заключенным того времени не составляло проблему найти перекладину. Однако спустя какое-то время во избежание случаев суицида стены и потолок таких камер стали делать сплошными. Поэтому сегодня заключенным остается подтягиваться только в специально отведенных для этого местах. И вам тоже придется найти что-нибудь подходящее.
Человеческое тело легко приспосабливается, поэтому подтягивайтесь, используя любой подходящий для этого объект — ветку дерева, трубу отопления, кромку балкона. Если хотите заниматься дома, закрепите турник в дверном проеме. Они дешевы, и их можно найти в любом магазине. Что-то повыше, например труба, спускающаяся с крыши, даже лучше, потому что вам не придется беспокоиться о том, чтобы достаточно высоко поднять ноги. Можно просто положить металлическую трубу на чердачную дверь в потолке и выполнять на ней в том числе подъемы ног.
И тем не менее самый лучший снаряд для подтягиваний — кольца. Можно купить их, а можно просто найти кольца, соответствующие по диаметру вашему кулаку, и трос, на котором их можно было бы закрепить.
References
Terry, T. “Historical Opinion: Karl Klein and the Squat.” (June 1984). Strength & Conditioning Journal. 6(3): 26-31.
Horschig, A., Sonthana, K., and Neff, T. (March 2017). The Squat Bible, pp. 97-100. Squat University LLC.
Verkhoshansky, Y. and Verkhoshansky, N. (2011). Special Strength Training Manual for Coaches, pp. 134-135, Verkhoshansky SSTM
Hoffman, J., et al. (February 2009). “Comparison Between Different Off-Season Resistance Training Programs in Division III American College Football Players.” The Journal of Strength and Conditioning Research. 23(1): 11-9.
Todd Lyons, Dynamic Fitness Equipment, Personal Communication, January 2019
Жим лёжа
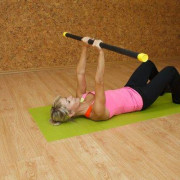
Бодибилдинг-эксперты, изучавшие работу мышц во время жима штанги лёжа заметили, что во время выполнения этого базового упражнения, мышцы верха спины подвергаются статическому напряжению. Это необходимо для того, чтобы обеспечить стабилизацию рук. Точно такую же роль выполняют трицепсы, которые напрягаются статически в самом начале выполнения упражнения. Это напряжение помогает удерживать локти согнутыми под прямым углом. Но так как сила статического напряжения мышц спины и трицепса слишком мала, то это мешает жать на все 100%.
Чтобы решить эту проблему нужно просто заставить мышцы трицепса и мышцы спины сокращаться гораздо интенсивнее. Достигнуть этой цели вам поможет обычный резиновый амортизатор замкнутый в кольцо, который нужно одеть на запястье и перекрутить восьмеркой. Только после того, как вы растяните амортизатор, вы можете взяться за гриф штанги. Это самое растяжение активизирует мышцы-стабилизаторы, в результате они сокращаются сильнее и от этого вы обязательно будете жать сильнее.
Power Snatch Benefits
There are several good reasons to invest the time to learn the power snatch. For one thing, if you have aspirations of competing in Olympic weightlifting, the power snatch offers a good starting point for learning the snatch that you’ll have to perform in competition. It’s an easier movement to master, safer to perform, and once you’ve got it down, it isn’t much harder to learn how to transition into a deep squat (thereby completing the full snatch).
For athletes, or anyone looking to enhance their athleticism, the power snatch can be used to develop triple extension power—a skill used in virtually every sport. The power snatch will absolutely help you take off into a run faster, jump higher, and hit harder.
The power snatch offers a good middle ground between exercises like the deadlift and the sprint. In a deadlift, the focus is building absolute strength, so you lift heavy but the bar moves relatively slow. That means it’s good for developing the muscles that help you perform fast movements, but it doesn’t train you to move fast in and of itself. A sprint, on the other hand, trains you to move fast, but it doesn’t offer the resistance the deadlift does to build muscle and strength. The power snatch fits perfectly in between them, providing enough load to stimulate strength gains while focusing on explosive speed to develop the ability to apply force rapidly. A strong guy/gal who can generate a lot of force in an instant is a formidable athlete.
If you are (or were) an athlete, you’re probably familiar with the power clean, another Olympic lifting variant that’s commonly used to build power. I like the power snatch better than the power clean for this purpose for a couple of reasons. For one, the power snatch actually develops more power output than the power clean, or even the regular snatch, for that matter, because the weight used is lighter and the bar moves faster.
The power snatch is also harder to cheat. With power cleans, you’ll often see lifters pulling hard with their backs and arms to get the weight up, failing to utilize the triple extension movement the way they’re supposed to. The power clean then becomes more of a sloppy reverse curl. When you use a power snatch, however, that’s not a concern. There’s no heaving the weight up with the wrong muscles. You have to emphasize hip and leg drive, or you simply won’t be able to do it.
Level 4 Pull-Up Workout: Top holds and Bar Hangs

Alright, so we’ve started off great! We’re working those pulling muscles and assisted variations – but an actual chin-up might feel miles (or kilometers) away.Heck, just even holding onto the bar may be a challenge without some assistance.
What should we do now?
How about we work on holding onto the bar!?!

Before we work on doing full range, unassisted chin-ups or pull-ups, it’s really helpful to be strong and confident in holding unassisted parts of the movement.This is where Top Holds and Bar Hangs come in!#1) A Top Hold is exactly what it sounds like – we hold the top position of the chin-up or pull-up for several seconds (5 to 10). You’ll likely find holding the top of the chin-up (palms facing you) easier than the pull-up.

This is definitely something that you want to first do assisted. We’ll then work to transfer more weight – bit by bit over several workouts – off our feet and onto our arms until we’re holding ourselves unassisted at the top.
Using a band is a good option for assisted chin-ups, but using a box, bench, or another sturdy object will be a better option here.
It will allow you to shift that weight onto your arms a little easier.

That said, if all you have is a band for this exercise then that’s ok! Look to use thinner and thinner bands, while lifting the feet and knees up a bit to further reduce assistance (as the band won’t be stretched as far).
#2) On the other side of the movement, we have the Bar Hang…which is pretty much what it sounds like too!

To perform a bar hang:
- Grab the bar with palms facing towards you or away from you. You’ll likely find hanging with palms facing away from you to be a bit more comfortable. Either direction will help strengthen up your grip.
- Just like with the top hold, you’ll want to start assisted then work to shift your weight from your feet onto your arms until you’re hanging unassisted.

To further supercharge this exercise: once you are hanging unassisted, work on retracting your shoulders down away from your ears.
Like so:

And so:

This small movement is TOUGH (and you can even practice it assisted) but getting strong here will set your shoulders in an even better position for your first chin-up/pull-up.
We’ll look to hang from the bar (assisted or unassisted) for a total time of 30 seconds to 1 minute. At first this time may be broken up into several sets (e.g., 10 seconds, 10 seconds, 10 seconds), but you should eventually work up to one full set.
So how should we integrate either of these into our training?
#1) For the Top Holds, do this at the start of your workout (after your warm-up) for 3 sets of 5 seconds. Make sure you give it your all! Really squeeze the muscles tight and put as much weight on the arms as possible!

With all that effort, you’ll want to give yourself 30 seconds to a minute rest in-between. I know that sounds like a lot for just 5 seconds of work – but if you were working hard enough, you’ll need it!
#2) For the Bar Hang, do this at the end of your workout for 30 seconds to a minute. Again, look to complete this in as few sets as possible, while making the exercise as challenging as possible. Move from assisted to unassisted, with the shoulders retracted downwards.

If you have to take a break during the bar hang time, then take enough rest so that the next hold is productive.
Here Are the Exercises You Can Include for Your Level 4 Workout Routine:
Monday:
- Top Hold (Assisted or Unassisted) – 4 sets of 5 seconds
- Assisted Pull-ups – 3 sets of 8 repetitions
- Bar Hang (Assisted or Unassisted) – 30 seconds total time
Wednesday:
- Top hold (Assisted or Unassisted) – 4 sets of 5-10 seconds
- Bodyweight Rows – 3 sets of 8 reps
- Bar Hang (Assisted or Unassisted) – 30 to 60 seconds total time
Friday –
- Top Hold (Assisted or Unassisted) – 4 sets of 5 seconds
- Assisted Chin-ups – 3 sets of 8 reps
- Bar Hang (Assisted or Unassisted) – 30 seconds total time
When you’re able to perform the Top Holds and Bar Hangs unassisted, then it’s time to move to the next level!!!
Русская программа подтягиваний
Ниже приведу мощную Русскую программу подтягиваний, которая подходит для любого уровня подготовки и позволит вам увеличить количество подтягиваний.
Программа для людей с максимумом 5 повторений в подходе
День 1 5, 4, 3, 2, 1
День 2 5, 4, 3, 2, 2
День 3 5, 4, 3, 3, 2
День 4 5, 4, 4, 3, 2
День 5 5, 5, 4, 3, 2
День 6 отдых
День 7 6, 5, 4, 3, 2
День 8 6, 5, 4, 3, 3
День 9 6, 5, 4, 4, 3
День 10 6, 5, 5, 4, 3
День 11 6, 6, 5, 4, 3
День 12 отдых
День 13 7, 6, 5, 4, 3
День 14 7, 6, 5, 4, 4
День 15 7, 6, 5, 5, 4
День 16 7, 6, 6, 5, 4
День 17 7, 7, 6, 5, 4
День 18 отдых
День 19 8, 7, 6, 5, 4
День 20 8, 7, 6, 5, 5
День 21 8, 7, 6, 6, 5
День 22 8, 7, 7, 6, 5
День 23 8, 8, 7, 6, 5
День 24 отдых
День 25 9, 8, 7, 6, 5
День 26 9, 8, 7, 6, 6
День 27 9, 8, 7, 7, 6
День 28 9, 8, 8, 7, 6
День 29 9, 9, 8, 7, 6
День 30 отдых
Порядок выполнения
Таким образом, вы начинаете с максимума для одного подхода, и убавляете по одному в каждом последующем подходе. На следующий день добавляете одно повторение в последнем сете. На другой день в предпоследнем сете, и так далее. Система рассчитана для тренировки в течении четырех недель. В конце месяца отдохните пару — тройку дней, и потом проверьте себя. Не редкость увеличение максимума для одного подхода в 2,5 — 3 раза. Другими словами, к концу программы вы с высокой вероятностью сможете подтягиваться 12-15 раз, если до нее могли сделать лишь 5 повторений.
Если вы можете подтягиваться 6-12 раз в максимуме, можете начинать тренироваться с 7 дня программы (для максимума 6 раз), или 19 дня (если максимум — 8 ) и т.д.
В случае, если вы застряли на каком-то дне и не можете сделать больше, вернитесь на неделю назад. Если вновь не получается , то смените программу тренировок. Ниже приводится программа для тех, чей максимум в подходе — 3 повторения. Она отлично подходит для тех, чьей целью является сила, а не количество повторений; подвесьте такое утяжеление к поясу, с которым вы можете выполнить максимум 3 подтягивания.
Русская программа подтягиваний для 3 повторений в подходе
День 1 3, 2, 1, 1
День 2 3, 2, 1, 1
День 3 3, 2, 2, 1
День 4 3, 3, 2, 1
День 5 4, 3, 2, 1
День 6 отдых
День 7 4, 3, 2, 1, 1
День 8 4, 3, 2, 2, 1
День 9 4, 3, 3, 2, 1
День 10 4, 4, 3, 2, 1
День 11 5, 4, 3, 2, 1
День 12 off
Теперь вы готовы перейти к Русской программе подтягиваний для максимума в 5 повторений.
Для бойца, способного подтянуться 15 раз в одном подходе, программа тренировок будет выглядет следующим образом:
Русская программа подтягиваний для максимума 15 повторений
День 1 15,12, 10, 8, 6, 4
День 2 15,12, 10, 8, 6, 6
День 3 15,12, 10, 8, 8, 6
День 4 15,12, 10, 10, 8, 6
День 5 15,12, 12, 10, 8, 6
День 6 отдых
День 7 15,14, и т.д.
Спортсмен с максимумом из 25 подтягиваний должен выполнять программу следующим образом:
День 1 25,20, 16, 12, 8, 4
День 2 25,20, 16, 12, 8, 8
День 3 25,20, 16, 12, 12, 8
День 4 25,20, 16, 16, 12, 8
День 5 25,20, 20, 16, 12, 8
День 6 отдых
День 7 25,22, и т.д.
Весовые категории
Взвешивание проводится, как правило, за один или два часа до соревнования с использованием калиброванных весов. На апрель 2017 года в тяжёлой атлетике установлены следующие весовые категории:
| Мужчины | до 56 кг | до 62 кг | до 69 кг | до 77 кг | до 85 кг | до 94 кг | до 105 кг | свыше 105 кг |
| Женщины | до 48 кг | до 53 кг | до 58 кг | до 63 кг | до 69 кг | до 75 кг | до 90 кг | свыше 90 кг |
Исторические
Мужчины:
| Годы | 1905-1913 | 1913-1946 | 1947-1950 | 1951-1968 | 1969-1976 | 1977-1992 | 1993-1997 | с 1998 |
| Наилегчайший вес | — | — | — | — | до 52 кг | до 52 кг | до 54 кг | — |
| Легчайший вес | — | — | до 56 кг | до 56 кг | до 56 кг | до 56 кг | до 59 кг | до 56 кг |
| Полулёгкий вес | — | до 60 кг | до 60 кг | до 60 кг | до 60 кг | до 60 кг | до 64 кг | до 62 кг |
| Лёгкий вес | до 70 кг | до 67,5 кг | до 67,5 кг | до 67,5 кг | до 67,5 кг | до 67,5 кг | до 70 кг | до 69 кг |
| Полусредний вес | до 80 кг | до 75 кг | до 75 кг | до 75 кг | до 75 кг | до 75 кг | до 76 кг | до 77 кг |
| Средний вес | — | до 82,5 кг | до 82,5 кг | до 82,5 кг | до 82,5 кг | до 82,5 кг | до 83 кг | до 85 кг |
| Полутяжёлый вес | — | — | — | до 90 кг | до 90 кг | до 90 кг | до 91 кг | до 94 кг |
| Тяжёлый (Первый тяжёлый) вес | свыше 80 кг | свыше 82,5 кг | свыше 82,5 кг | свыше 90 кг | до 110 кг | до 100 кг | до 99 кг | до 105 кг |
| Второй тяжёлый вес | — | — | — | — | — | до 110 кг | до 108 кг | — |
| Супертяжёлый вес | — | — | — | — | свыше 110 кг | свыше 110 кг | свыше 108 кг | свыше 105 кг |
How to Do Weighted Pull-Ups

Personally, my favorite thing to do in a gym is weighted pull-ups:

If you’re at this level and interested in doing so, here’s what you need to do:
- Get a weight belt. I bought this one on Amazon and it’s worked out incredibly well for me. I’ve tried doing the whole “put weights in a backpack” thing, and it certainly works. But the angle of the weights hanging off your back is weird. With a weight belt, the weight hangs down between your legs (not a euphemism) so it feels more natural.
- Add small amounts at a time. Most gyms will have 2.5 lb (roughly 1kg) weights; you might feel stupid putting on a big weight belt and only hanging a tiny weight off it, but you need to start somewhere.
- Consistently add more weight. I’ll warm up with two sets of 5 pull-ups with no extra weight, and then do 3 sets of 5 weighted pull-ups. If I can complete all 3 sets of 5 reps (with my chin over the bar for every rep), I’ll make a note to add 2.5 or 5lbs (1 or 2kg) to my weight belt for the next time.
If you want any help scaling your workouts, check out Nerd Fitness Journey. We created our pull-up adventure for all skill levels: from someone just starting out to someone who can do pull-ups with no assistance. No guesswork needed on scaling your workout, just jump into the app and follow it’s next steps.


What Are the Benefits of Doing Pull-Ups? What Muscles Do Pull-Ups Work?

Pull-ups are one of the best exercises you can do.
Here’s why:
#1) Pull-ups work every muscle in your upper body. Pull-ups are what we call a “compound exercise,” meaning they work out several muscle groups at once.

The muscles in your back, arms, and even abs all grow stronger from doing pull-ups.
Abs?
Yep! You engage your abs as you stabilize your body while hoisting yourself up.
#2) Pull-ups are a great indicator of overall strength. Since it’s just you against the force of gravity, if you can do a pull-up or chin-up, you have a greater strength-to-bodyweight ratio.
With push-ups, some of your body’s weight is supported by your feet.

Not so with pull-ups. It’s just you and the bar.
#3) Pull-ups will help you improve your posture. By building strength in your PULL muscles, we strengthen and tighten your back muscles.
This will naturally cause you to pull your shoulder blades back and down into proper position, providing you a better posture.
#4) Pull-ups improve grip strength. Grip strength is another indicator of overall health. In fact, a strong grip has been correlated with lower mortality rates.
Pull-ups are a great way to improve your grip since your hands and fingers have to support your body’s weight during the movement.
If you’re looking for a stronger handshake, regularly doing pull-ups will go a long way towards that goal.
A quick note: we have a full guide on improving your grip strength if you’d like to learn more.
#5) Pull-ups are convenient. Some other big compound movements require decent amounts of equipment to perform, like the deadlift or bench press. Meaning unless you have weights, barbells, and power racks at your home, you’re probably heading to the gym for your training.
Not so with pull-ups.
Doing a pull-up really only requires a pull-up bar, but even that can be substituted.
You can use monkey bars at a local playground, a towel around a strong beam, or even a sturdy tree:

If it’s taller than you and can support your weight, you can do pull-ups from it.
Alright, enough about why you should do pull-ups. Let’s show you how it’s done.
CLEAN TECHNIQUE
- Set-Up: Start with your feet at a hip-width stance. Set your hands on the barbell so they are approximately one thumb’s distance from the hips. Grip the barbell with a hook grip. Brace your core.
- Execution: Your hips and shoulders should rise at the same rate on the pull.
- Extend the hips and knees rapidly and fully. Shrug your shoulders and pull yourself under the bar.
- Receive the bar in the front rack position, at the bottom of the squat.
- Stand tall to reach full hip and knee extension at the top of the movement.
- Keep the bar in the racked position until your hips/knees have fully extended.
(If the WOD calls for a “power clean,” receive the barbell in a ¼ squat or ½ squat position. If the WOD calls for a “muscle clean,” receive the barbell in an upright position. If the WOD calls for a “hang clean” or a “hang power clean,” begin the movement with the barbell anywhere above the knees.)

Source: Dave Lisson on Unsplash
Points of Performance: To get a “good rep,” ensure the following:
– The barbell starts on the floor (unless a “hang” position is required)
– Your hip crease drops below your knee crease at the bottom of the squat (unless a “power” or “muscle” clean is required)
– You reach full hip and knee extension at the top before bringing the bar back down to the ground
– In the front rack position, your elbows remain in front of the bar
Pro-Tip: The first pull of the clean (when you lift the bar from the ground to mid-thigh) should be a controlled, balanced pull. If you rip/yank the bar from the ground, you can shift your position and get off balance. The result will be a missed lift, especially if the weight is heavy.